Host-based installation
In the current installation mode, users are guided to install Rainbond from a bare metal server, which can be a physical machine, virtual machine, or various cloud hosts.
During the installation process, the graphical console is started with a command, and then the entire Rainbond cluster is installed based on the graphical interface.
Precondition
Operating system requirements
| Supported operating systems | Minimum requirements (per node) |
|---|---|
| CentOS 7.x,8.x | CPU:2,Internal storage:4G,Disk:50GB+ |
| CentOS Stream 8,9 | CPU:2,Internal storage:4G,Disk:50GB+ |
| Ubuntu 16.x,18.x,20.x,22.x | CPU:2,Internal storage:4G,Disk:50GB+ |
| Debian 9.x,10.x,11.x | CPU:2,Internal storage:4G,Disk:50GB+ |
| Anolis OS 7.x,8.x | CPU:2,Internal storage:4G,Disk:50GB+ |
Network requirement
The IP address of the server cannot be in the private network segment 169.254.0.0/16. This address segment is reserved for Link-Local and is usually used to automatically assign IP addresses in the absence of a DHCP server. In this case, Kubernetes may assume that the server does not have a proper network connection, causing the installation to fail.
Other requirements
| core | OpenSSH | Node port |
|---|---|---|
| 4.0+ | 7.0+ | 80,443,6060,7070,8443 |
tip
The installation mode supports Linux x86 and Arm64 operating systems, and supports [localization and innovation].(/docs/localization-guide).
Deploy the Rainbond console
info
The Rainbond console runs on Linux, Windows(Docker Desktop), or Mac(Docker Desktop).
Install Docker using the script provided by Rainbond.
curl -sfL https://get.rainbond.com/install_docker | bash
Start the All-In-One console
docker run -d -p 7070:7070 \
--name=rainbond-allinone --restart=always \
-v ~/.ssh:/root/.ssh \
-v ~/rainbonddata:/app/data \
registry.cn-hangzhou.aliyuncs.com/goodrain/rainbond:v5.14.2-release-allinone
info
The console will generate data that needs to be persisted, stored in the '~/rainbonddata' directory of your deployment node.
Start with the host
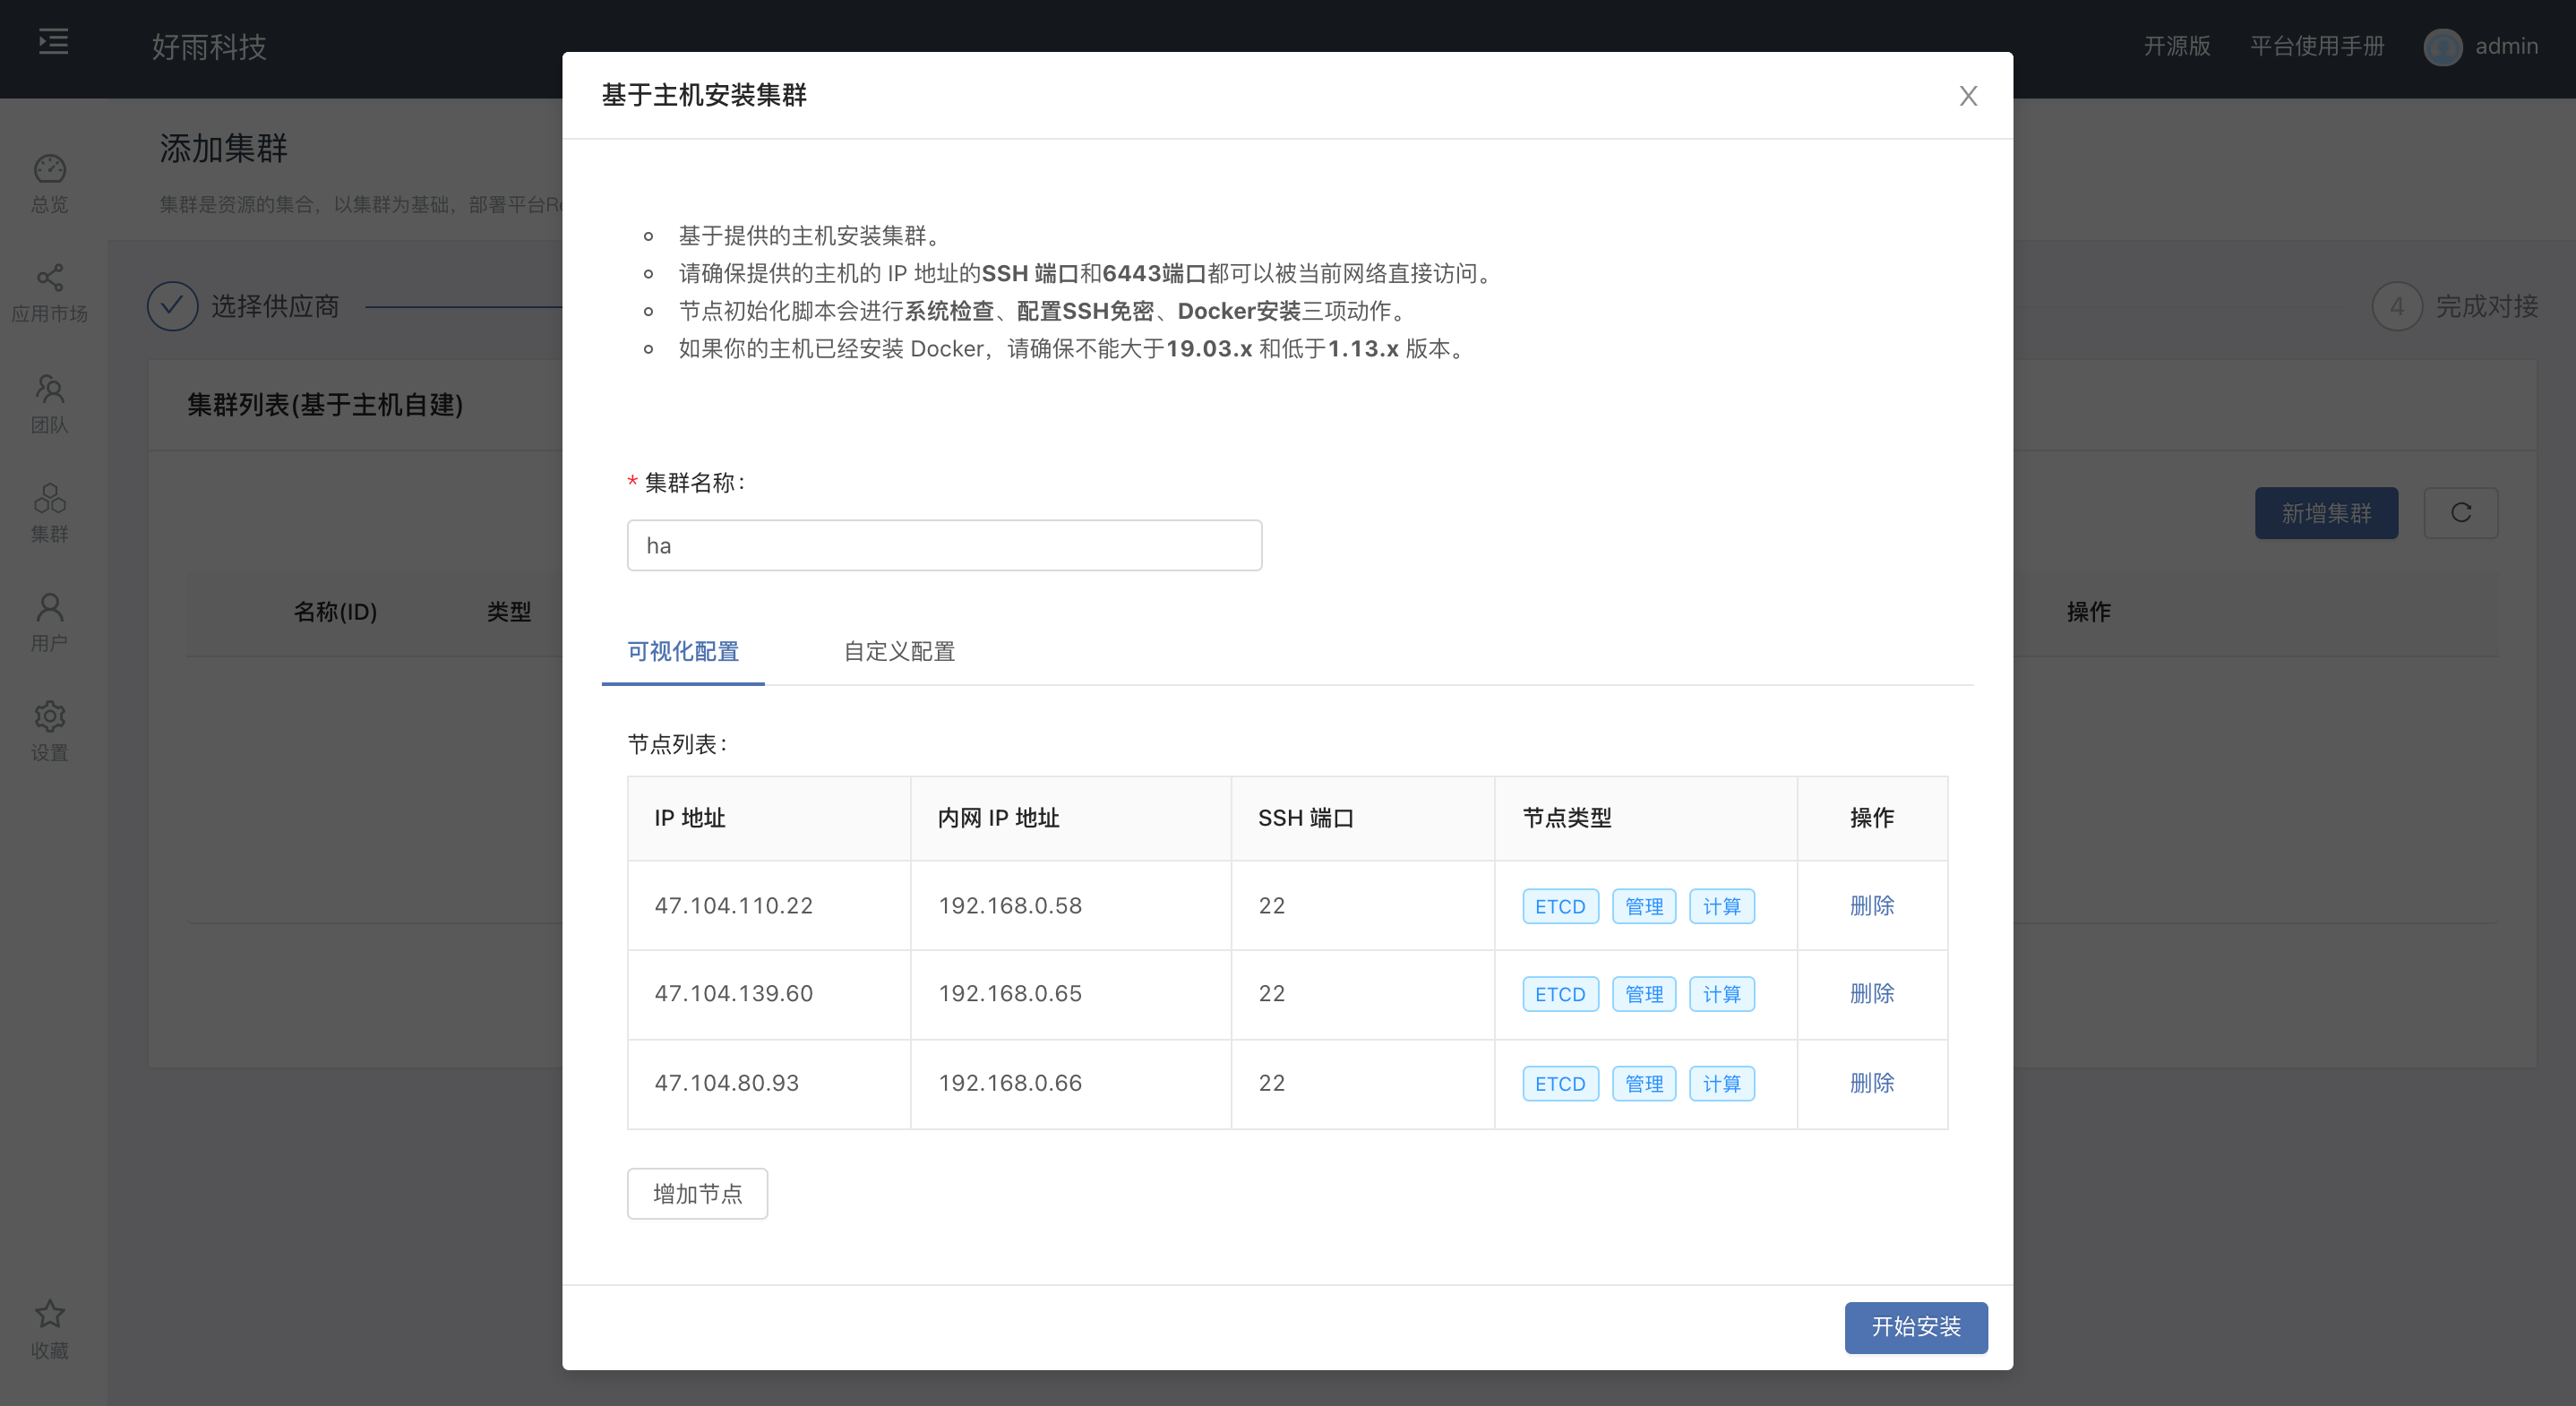
After login, go to Platform Management > Cluster -> Add Cluster -> Install from Host The GUI installation page is displayed.
Fill in node information
The current Aliyun server has an external IP address. If the server does not have an external IP address in private deployment, the IP address and Intranet IP address must be entered as the server IP address.
The current demonstration cluster is 3 nodes, Kubernetes properties ETCD, management, computing properties multiplexed, in self-deployment according to their own plannin select node properties.

After the node information is filled in, run the replication node initialization command on all nodes in the cluster as prompted.
After the initialization is complete, click Next, wait until the Kubernetes cluster is installed successfully, and proceed to the next step when the state is Running
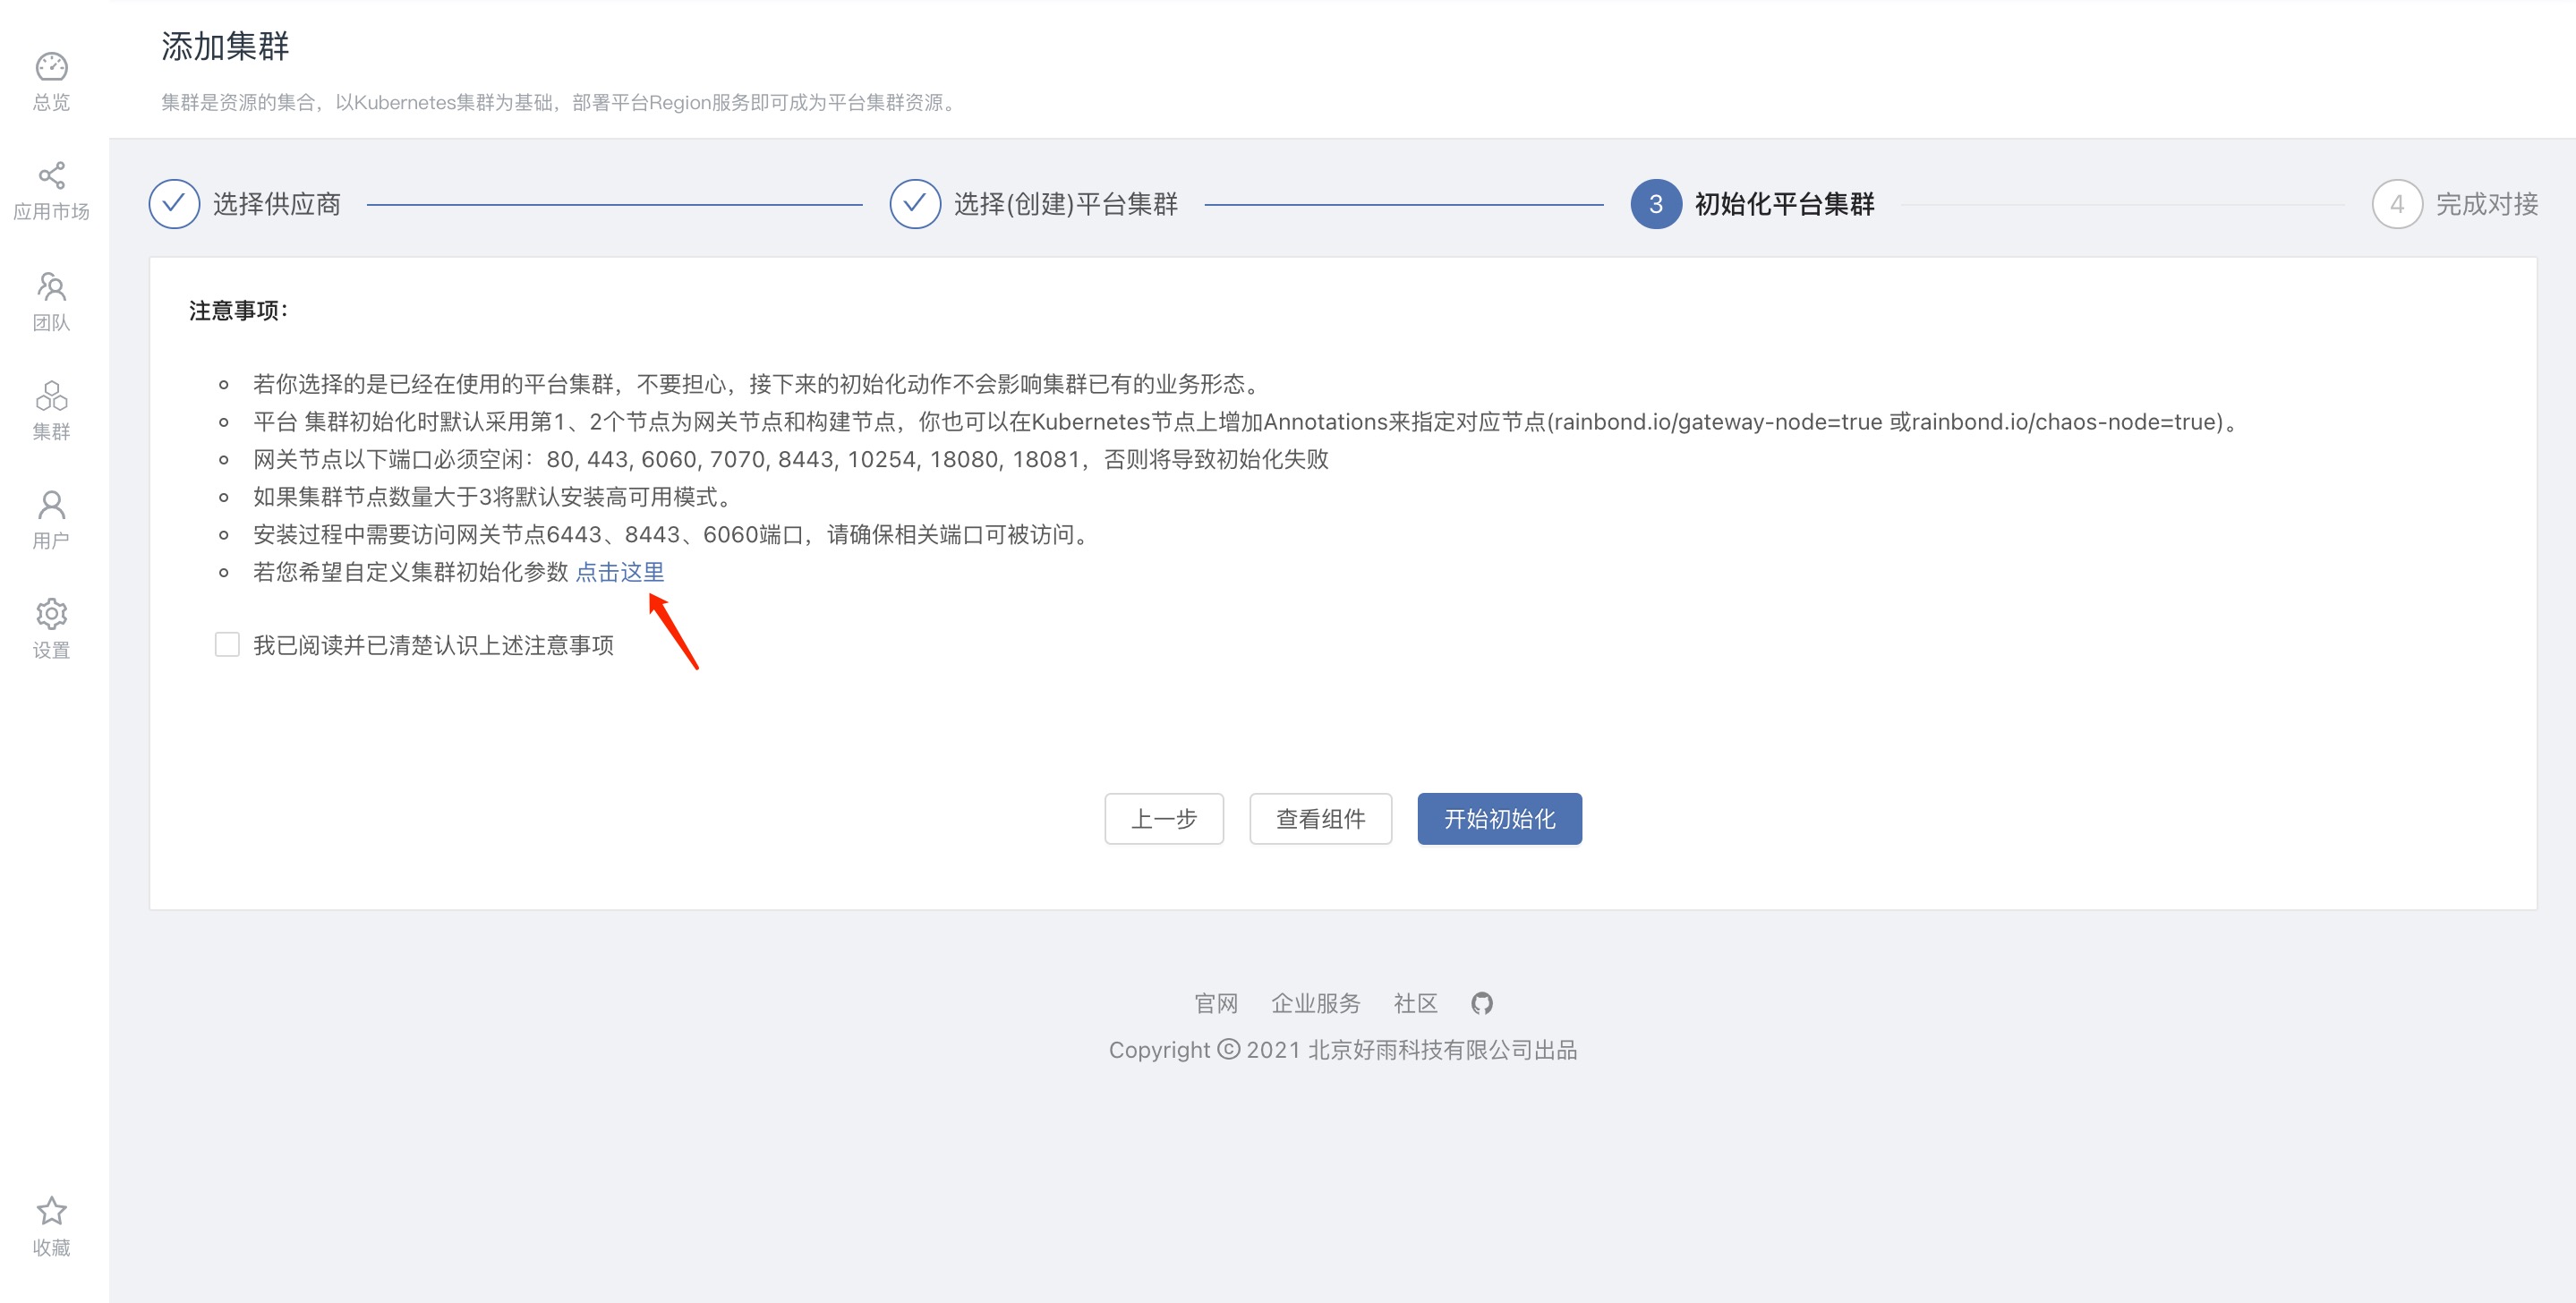
After checking I have read and clearly understand the above precautions, click 'Start initialization' and wait for the installation to complete.
- During the Rainbond installation and deployment process, you can customize cluster initialization parameters and configure them on the cluster initialization platform page. For details, refer to the document High Availability Installation。

Next step
- quick start: Quickly deploy your first application on Rainbond.
- migrate applications: You can refer to this document to migrate standalone applications to this Kubernetes cluster.
Common problem
Through the graphical interface based on host install Rainbond encountered any problems in the process, can be the reference document Web interface installation problem troubleshooting guide to the problem. Or join wechat group, Dingdinggroup for help.